After the colder months have gone, it’s time to start thinking about summer. Many people rely on their air conditioning systems to keep their indoor temperatures cool when it turns hot outdoors. But, we tend to take our AC systems for granted, and we expect them to work without any problems after months of inactivity. This is unreasonable, heating and cooling equipment is complex, and it needs regular professional maintenance. When an AC system is well taken care of, it’s more efficient, less likely to fail when you need it, and it may even last longer. In this article, we will take a look at seven things that you should consider before you turn your AC system on for summer.
- Remove the Covers
Some people tend to leave their outdoor unit covers on throughout fall and winter. This is unnecessary because the unit is designed to withstand all but the most severe temperatures. The only season when you may want to put a cover over the unit is during fall. This is because material, such as leaves, twigs, seeds, and other detritus, can become trapped inside the unit. These are organic materials, so they tend to rot, they may even be wet, and this can lead to corrosion issues. If you do have the cover still fitted to your outdoor AC unit, remove it now, store it in a dry location, and only put it on during fall.
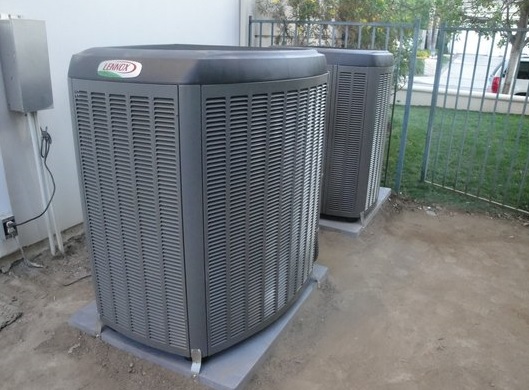
- Clean the Outdoor Unit
Now that the cover is removed, you can go ahead and give the outdoor unit a good clean. This unit is where the condenser is located. This is a key component, and it works better when it’s clean. Remove the top of the outdoor unit and spray the dust and debris with a garden hose. There may be a lot of dust because it’s sucked into the unit during normal operations. Take care to use the water to force the dust out of the coil and avoid pushing it further into the component. There are chemical cleaning products for this purpose, but they should be avoided because they can cause premature corrosion issues. Even a gentle cleaning chemical must be thoroughly rinsed away to avoid damage to the unit. If you’re not sure how to proceed, it’s a good idea to contact your local HVAC specialist and ask them to clean the unit for you.
- Check the Drain Lines
You can expect to see a little moisture leakage from your primary drain line when the weather is humid. But, if you notice a lot of water, check the drain outlet for signs of rust. If you notice corrosion, contact your local heating and cooling specialist for expert help. This is equally true if you see any leaking from the secondary drain line. If you’re not sure how to tell them apart, just remember that the primary drain line is typically not visible. It’s usually located behind the unit, where it can drain away the condensation created by every indoor unit in your home. The secondary drain line is placed in an easy to find location so that you will see a water leak. This is typically above a window or door, or it could be in the garage. If you live in a townhouse or condo, it may be in the hallway of your home. Remember that a secondary drain line water leak only occurs if there is a problem with the outdoor unit.
- Clear the Space
Over winter, there could be some vegetation growth around the unit, and this needs to be trimmed back to at least 12 inches. This will prevent any branches or other organic debris from getting in the unit where they could cause moisture issues, including mold growth, corrosion, and a loss of efficiency. It’s also a good idea to move any stored garden furniture, ladders, tools, and other items that may have been stored in the area. The condenser in the outdoor unit needs adequate airflow to operate efficiently.
- Inspect the Copper Line
There are two copper lines that come from the outdoor unit, and the larger one can be inspected as a quick check to confirm everything is working. Turn on your AC system, touch the larger copper line, and it should feel cold like your refrigerator. In fact, This is a good rough guide that your system is operating, but without an annual checkup, there is no way to know that it’s working efficiently. Before each cooling and heating season, it’s a good idea to schedule some regular maintenance. This will ensure that the system is working efficiently and potential problems can be identified earlier. When a problem is fixed early, it usually leads to a less expensive repair bill.
- Check the Indoor Unit
Once the AC system is running, it should lower the temperature of your home to the setting on your thermostat. Check for cooler air at the vents, and if the air is colder than outside, it’s working. At this point, some people experience problems because they can’t feel any cool air. First, check the batteries in the thermostat and make sure it’s been adjusted to the new summer settings. If you can seem to get cooler air contact your local HVAC specialist, and they can locate the problem for you.
- Excessive Noise Issues
It’s perfectly normal to hear some noise if you have an older AC system. The latest compressor units are pretty quiet in comparison, but if you can hear a loud noise, there is a problem. If you can hear a rattling or banging noise, the culprit is probably the fan that has worked loose or broken entirely. If the condenser motor breaks, you will hear a screeching noise and a loud bang. You cannot run the AC system without a compressor, it’s simply a waste of energy, and it needs to be fixed.
If you want to get your HVAC system ready for the next heating or cooling season, contact your local heating and cooling specialist today.